Transform Your Space: Delta V-Tech Fence Installation Instructions in 2024
Your Guide to a Secure and Stylish Perimeter
Among the various fencing options available, Delta V-Tech Fence Installation stand out for their innovative design and unparalleled durability. This comprehensive guide will walk you through the process of installing Delta V-Tech fences, ensuring you achieve the perfect blend of functionality and style for your outdoor space.
Understanding Delta V-Tech Fencing
Before diving into the installation instructions, it’s essential to understand what Delta V-Tech fencing is and why it may be the right choice for your property. Delta V-Tech fences are constructed from advanced materials that are designed to withstand harsh weather conditions, resist rot, and maintain their appearance over time.
These fences are not just practical; they are also aesthetically pleasing. Delta V-Tech offers a variety of styles and colors, allowing you to choose a design that complements your home’s architecture. Additionally, their robust construction ensures that they provide a strong barrier against intruders and animals, making them an ideal choice for both security and privacy.
Benefits of Delta V-Tech Fencing
- Durability: Made from high-quality materials that resist decay and damage from pests.
- Low Maintenance: Requires minimal upkeep compared to traditional wood fences.
- Versatile Designs: Available in various styles to suit different tastes and landscapes.
- Eco-Friendly Options: Many Delta V-Tech products are made from recycled materials, contributing to sustainability.
- Cost-Effective: While the initial investment may be higher, the long-term savings on maintenance and repairs are significant.
Tools and Materials Needed
To successfully install your Delta V-Tech fence, gather the following tools and materials:
Tools
- Measuring Tape: For accurate distance measurements.
- Post Hole Digger: Essential for digging holes for your fence posts.
- Level: Ensures your fence is installed straight.
- Hammer: For driving in nails or stakes.
- Screwdriver: For attaching components.
- Power Drill: For quicker assembly and fastening.
- Safety Gear: Including gloves and safety glasses.
- String Line: To ensure alignment of posts.
- Chalk Line: For marking straight lines on the ground.
Materials
- Delta V-Tech Fence Panels: Choose the design and height suitable for your property.
- Fence Posts: Make sure to purchase the correct quantity based on your layout.
- Concrete Mix: To secure your fence posts.
- Wood or Metal Stakes: For marking the layout.
- Nails or Screws: For fastening panels to posts.
- Post Caps: Optional, for added aesthetic appeal.
- Gravel: Optional, for drainage at the base of posts.
- Wooden Planks: For temporary supports if needed.
Step-by-Step Installation Instructions
Step 1: Planning Your Fence Layout
Planning is the cornerstone of any successful fencing project. Begin by determining the exact location of your fence. This step involves several considerations:
- Property Lines: Verify your property lines to ensure you’re not infringing on your neighbor’s land. This may require consulting your property deed or hiring a surveyor.
- Local Regulations: Familiarize yourself with local zoning laws and homeowner association regulations regarding fence height, design, and materials. Many areas have specific guidelines that you must adhere to.
- Purpose of the Fence: Decide on the primary purpose of your fence. Is it for security, privacy, or decorative purposes? This decision will influence your choice of height, style, and materials.
- Tip: Use stakes and string to outline the fence’s perimeter visually. This will give you a clear idea of how the fence will look in the space.
Step 2: Measuring and Marking
With your layout determined, the next step is measuring and marking where your posts will be placed.
- Post Spacing: Typically, fence posts should be spaced 6 to 8 feet apart. This spacing allows for optimal support and stability. Adjust the spacing based on the length of your Delta V-Tech panels.
- Corner and End Posts: Mark the locations for corner posts and end posts first, as these will serve as the framework for the rest of your fence.
- Pro Tip: Use a measuring tape to ensure that the distances between posts are consistent. It’s helpful to have a helper hold the tape at one end while you measure.
Step 3: Digging Post Holes
Once you have marked your post locations, it’s time to dig the post holes. This step is crucial for the stability of your fence.
- Hole Depth: The depth of your post holes should be at least 2 feet, or one-third the height of the fence, whichever is greater. This depth helps ensure that the fence remains upright and secure during wind and other stressors.
- Hole Width: The holes should be approximately 3 times the width of your posts, allowing enough space for concrete to support the posts effectively.
- Note: If your area experiences heavy winds, flooding, or soil erosion, consider digging deeper to enhance the stability of your posts.
Step 4: Setting the Fence Posts
After digging the holes, it’s time to set the posts:
- Positioning: Place the fence posts into the holes, ensuring they are vertical. Use a level to check that each post is straight.
- Support: You may need to use temporary wooden planks or stakes to hold the posts in place while you fill the holes.
- Concrete Mix: Fill the holes with concrete mix. Follow the manufacturer’s instructions for mixing and application. Generally, you should add water to the dry mix and stir until you reach a thick, consistent texture.
- Curing Time: Allow the concrete to cure for at least 24 hours before proceeding with the installation of panels.
- Tip: To enhance drainage and prevent moisture buildup, consider adding a few inches of gravel at the bottom of each post hole before placing the posts and pouring concrete.
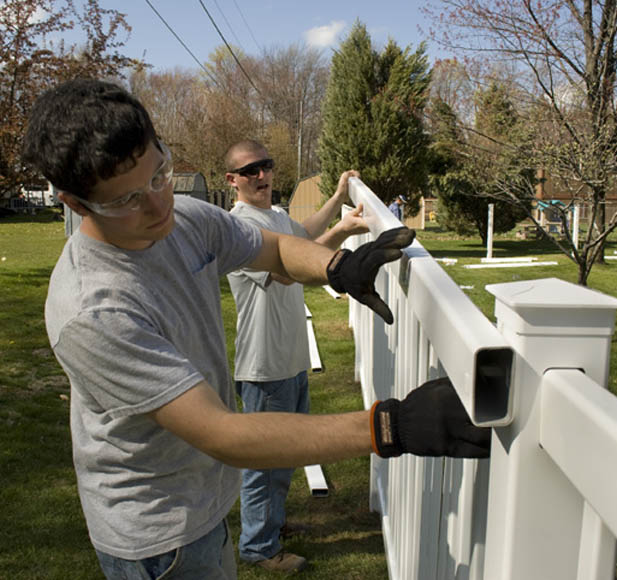
Step 5: Attaching the Fence Panels
With your posts securely set, you can now attach the Delta V-Tech panels:
- Panel Placement: Start at one end of the fence line and work your way along. Position each panel between two posts, ensuring that they fit snugly.
- Securing Panels: Use screws or nails to secure each panel to the posts. Be sure to use exterior-grade fasteners to prevent rusting and ensure durability.
- Alignment: As you attach each panel, use a level to ensure that they are even and aligned correctly.
- Pro Tip: Leave a small gap (about half an inch) between the bottom of the panels and the ground to allow for drainage and prevent rot.
Step 6: Installing Post Caps
Once all the panels are attached, consider installing post caps. These caps serve two purposes:
- Aesthetic Appeal: They provide a finished look to your fence and can enhance its overall appearance.
- Protection: Post caps help prevent moisture from entering the posts, reducing the risk of rot and damage.
To install post caps:
- Choose the Right Caps: Select caps that match the style of your fence. Delta V-Tech offers various designs, including decorative options.
- Attachment: Use exterior-grade adhesive or screws to secure the caps to the top of each post.
Step 7: Final Touches and Maintenance
After the installation is complete, it’s essential to perform a final inspection:
- Check for Gaps: Ensure that there are no gaps between the panels and posts, and that everything is securely fastened.
- Inspect for Levelness: Walk along the fence line and visually inspect it to ensure all panels are level and aligned.
- Clean Up: Remove any debris or leftover materials from the installation process to keep your yard looking neat.
Regular Maintenance Tips
To keep your Delta V-Tech fence looking great and functioning well over the years, consider the following maintenance tips:
- Regular Inspections: Periodically check your fence for any signs of damage, such as cracks, loose panels, or broken posts. Address any issues immediately to prevent further damage.
- Cleaning: Clean your fence regularly with mild soap and water to remove dirt and debris. Avoid harsh chemicals that could damage the surface.
- Repainting or Staining: If your fence is painted or stained, plan to refresh the finish every few years to keep it looking its best.
- Inspect Post Caps: Regularly check post caps for damage or wear, and replace them as needed to protect the fence posts.
Frequently Asked Questions
1. How long does the installation take?
The installation time can vary based on several factors, including the size of your fence and your experience level. A typical installation may take anywhere from a few hours for a small area to a couple of days for larger projects. If you’re working with a team, the process can be expedited significantly.
2. Do I need a permit to install a fence?
Before installing your fence, check with your local building department to determine if a permit is necessary. Regulations regarding fence installation vary by location, and obtaining a permit can prevent potential disputes with neighbors or local authorities.
3. Can I install the fence myself?
While it’s possible to install a Delta V-Tech fence as a DIY project, consider hiring professionals if you’re unsure or if the project is large. Professional installers can ensure the job is done efficiently and correctly, saving you time and potential mistakes.
4. What types of Delta V-Tech fences are available?
Delta V-Tech offers a variety of fencing styles, including privacy fences, decorative fences, and security fences. Each style comes in various colors and heights, allowing you to select the best option for your needs.
5. Are Delta V-Tech fences environmentally friendly?
Many Delta V-Tech products are made from recycled materials, contributing to sustainability efforts. Additionally, their long lifespan and low maintenance requirements reduce the need for replacements and repairs, making them an eco-friendly choice.
Cost Considerations
While Delta V-Tech fences may have a higher upfront cost compared to traditional wood fences, their durability and low maintenance can lead to significant long-term savings. Here are some factors to consider when budgeting for your fence installation:
- Material Costs: Calculate the total cost of the materials needed, including panels, posts, concrete, and fasteners.
- Labor Costs: If you’re hiring professionals, obtain quotes from several contractors to compare prices. DIY installations can save labor costs but consider the time investment.
- Permits and Fees: Factor in any permit costs or fees associated with the installation process.
- Maintenance Costs: Although Delta V-Tech fences require minimal maintenance, budget for occasional cleaning, repairs, and any enhancements you may want to make over time.
DIY vs. Professional Installation
Choosing between a DIY installation and hiring professionals depends on your skills, the complexity of the project, and your budget. Here are some considerations for each option:
DIY Installation
Pros:
- Cost savings on labor.
- A rewarding project that allows you to learn new skills.
- Flexibility to work at your own pace.
Cons:
- Requires physical labor and time commitment.
- Potential for mistakes that could lead to additional costs.
- May lack the expertise of professional installers.
Professional Installation
Pros:
- Expertise and experience ensure a high-quality installation.
- Saves time and effort, allowing you to focus on other tasks.
- Access to professional tools and equipment.
Cons:
- Higher upfront cost compared to DIY.
- Less control over the timeline and process.
Conclusion
Installing a Delta V-Tech fence can significantly transform your property, providing both security and a stylish boundary. With the right tools, materials, and step-by-step instructions, you can undertake this rewarding project yourself or confidently hire professionals to do the job.
By investing the effort into a quality installation, you’re not just enhancing your home’s appearance—you’re also creating a safe and secure environment for your family and pets. Enjoy your new Delta V-Tech fence, knowing that you’ve taken a significant step toward improving your outdoor space!
Final Thoughts
As you embark on your Delta V-Tech fence installation journey, remember that thorough planning, careful execution, and regular maintenance are key to ensuring your fence lasts for many years to come. Whether you choose to tackle the project yourself or hire professionals, the result will be a beautiful and functional addition to your property that enhances both its value and security.
So roll up your sleeves, gather your tools, and get ready to transform your space with a Delta V-Tech fence! For more information please visit techwebme.com